-
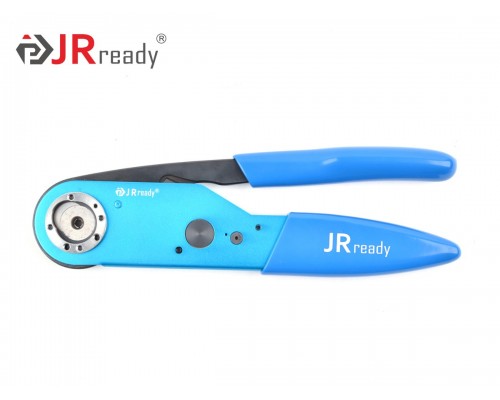
JRREADY GS200-1 Four-indent Hand Crimp Tool 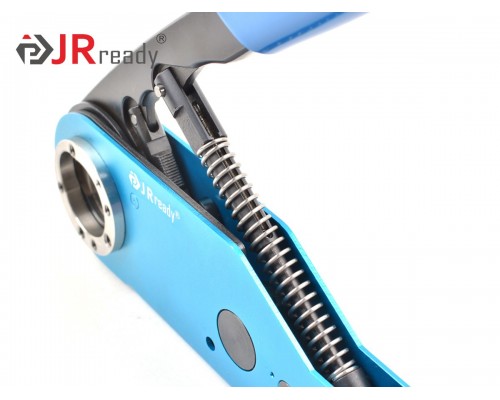
JRREADY GS200-1 Four-indent Hand Crimp Tool 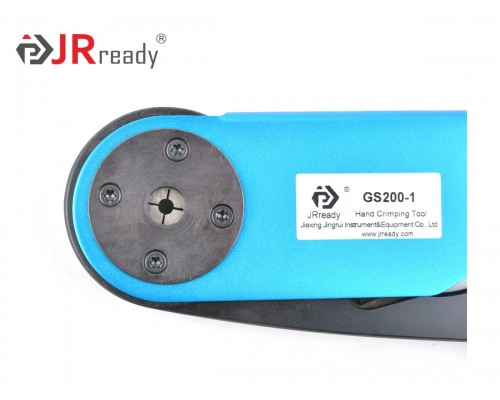
JRREADY GS200-1 Four-indent Hand Crimp Tool 
JRREADY GS200-1 Four-indent Hand Crimp Tool 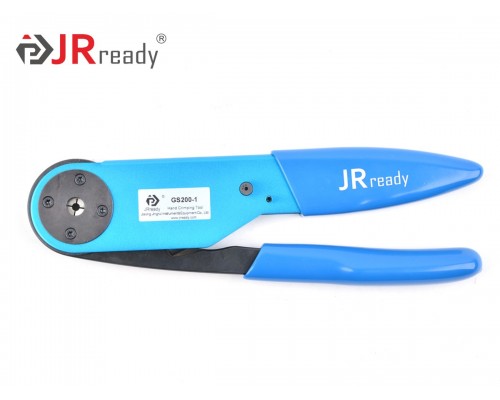
JRREADY GS200-1 Four-indent Hand Crimp Tool -
-
JRREADY GS200-1 Four-indent Hand Crimp Tool
1. Designed according to M22520/31-01;
2. Equipped with replaceable G2P330 positioner;
3. Contacts Model: M39029/27, M39029/28, M39029/75;
4. The crimp tool has an 8-position adjustment knob. The actual working selector number is the No. 4;
5. The four-indent circular crimping of shielding wires and outer contacts./upload/manual/usermanual/D29_GS200-1_USE-WB-P.pdf


Brand: PRECISETOOL | Standard: M22520/31-01 | Model: GS200-1 |
Crimp Style: Four-indent Circular Crimp | Material: Mould Steel | Selector Numbers: 8 |
Wire Size (AWG/mm²): / | Thru-hole Diameter (mm): / | Dimensions (mm): 247.65*58.42*25.4 |
Internal Number: D29 | Weight (g): 567 | |
| GS200-1 is a aviation four-indent crimp tool designed according to M22520/31-01; It is used for the crimping of wires and contacts in electronic connectors. Equipped with replaceable & fixed G2P330 positioner which is designed according to M22520/31-02. | ||
| Model of check tool: G443 (Note: the gage needs to purchase separately) | ||
Features
1. Material of Mould Steel (Good Durability & Good Anti-deformation & Good appearance & Anti-rust)
2. Four-indent Crimp Tool (Crimp tension is 1.3 times that of the hexagonal crimp, more stable & more reliable)
3.8 Selector Numbers (Adjustable crimping ranges in different selector number, more convenient for wider applications)
Crimp Range
The crimp tool has an 8-position adjustment knob. The actual working selector number is the 4th, as following:
Selector NO. | Intender Working Diameter mm/INCH | |
A(GO) | B(NO GO) | |
2 | 3.61/0.1420 | 3.71/0.1460 |
The crimping tool adopts curve propulsion mechanism, its applied force transfers through four curves in the head cavity of the right plier handle to the four indenters. The four intenders do the centripetal linear motion, which makes its front-end teeth crimp the contact to complete the crimping process. The cycle controlled precision ratchet assures the consistency of impression and the crimping quality of wires and contacts.
Installation of Positioenrs

Crimping Instructions
Step 1 : Put the contact |
Step 2 : Insert the wire |
Step 3 : Crimp and open the crimp tool |
Step 4 : Remove the crimped contact |